Author

David Yates

Browsing

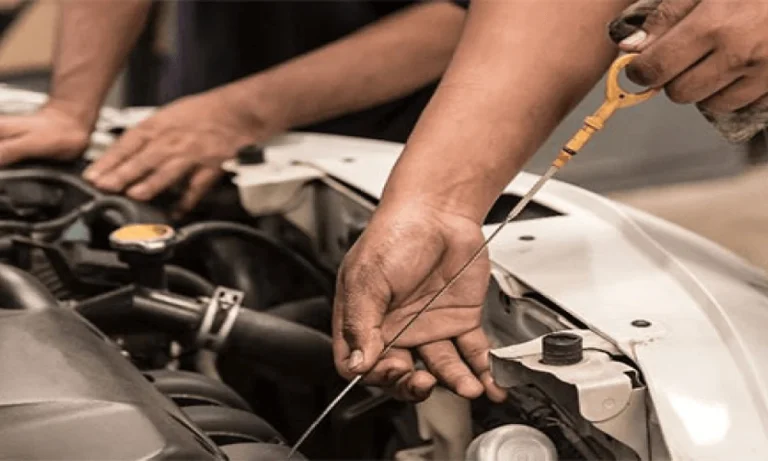
So proper engine lubrication remains essential for protecting internal engine components during everyday driving. Engine oil creates a protective layer between moving metal surfaces inside cylinders. The piston rings depend on this lubrication for smooth and controlled movement. Without sufficient oil the rings can experience excessive friction and damaging heat. Sometimes poor lubrication develops slowly before noticeable engine symptoms begin. Now understanding this connection can help prevent expensive internal engine repairs.

How Engine Oil Protects Piston Rings

When lubrication becomes inadequate the protective oil film can become dangerously thin. Metal surfaces may then experience increased contact during repeated engine cycles. This condition can accelerate wear across both rings and cylinder walls. The affected components may gradually lose their original operating efficiency. Therefore maintaining appropriate oil quality remains important for protecting piston rings.

Low Oil Levels Can Increase Ring Wear

The problem can become more serious during extended journeys or heavy engine operation. High temperatures can reduce lubrication effectiveness when oil levels remain dangerously low. Sometimes the engine may develop unusual sounds before major damage becomes apparent. Regular oil level checks can help identify potential lubrication problems early.

Dirty Oil Can Affect Piston Ring Performance

Old engine oil can gradually collect contaminants from normal engine operation. These contaminants can affect lubrication quality and increase friction between moving surfaces. Thickened oil may also circulate less effectively through narrow engine passages. Restricted oil circulation can reduce lubrication around piston rings and cylinder walls.

So poor oil condition can contribute to accelerated internal engine wear. Contaminated oil may also carry abrasive particles throughout sensitive engine components. These particles can increase surface wear during repeated piston movement. Professional servicing can help determine whether deteriorated oil has affected engine performance.

Incorrect Oil Can Create Lubrication Problems

Modern engines can have different lubrication requirements based on design and operating conditions. Therefore selecting suitable engine oil remains important for protecting piston rings. A qualified technician can recommend appropriate oil according to manufacturer requirements. Hudson Automotive can inspect lubrication concerns when unusual engine behaviour develops.

Signs Of Possible Piston Ring Damage

Sometimes engine performance can decline gradually without an immediate dramatic warning. Poor acceleration and rough running may accompany advanced internal engine wear. Unusual exhaust emissions can provide another indication of potential ring problems. A professional inspection can identify whether piston rings require further investigation.

Professional Maintenance Helps Protect Piston Rings

Preventing lubrication related damage begins with appropriate engine maintenance. Regular oil servicing helps maintain effective lubrication throughout the engine. Correct oil selection also supports reliable protection for piston rings. Early inspection can identify leaks or oil consumption before severe damage develops.

A dependable Auto Repair in Columbus, NE service can also support proper engine maintenance. Professional attention can reduce the risk of avoidable piston ring deterioration. Good lubrication practices ultimately contribute to longer engine life and dependable performance. Hudson Automotive can help identify underlying lubrication concerns before they become more expensive problems.

Self-drive rental gives drivers direct control over their travel arrangements, but the booking still requires careful planning. Car rental for self drive should match the driver’s vehicle needs, rental period, driving plans and understanding of the agreement.

Before collecting the vehicle, review six important details so you know what the arrangement involves.

1. Confirm Driver Requirements

Check the requirements for the person who will drive the vehicle. Review the necessary driving licence, age conditions and documentation before booking.

If more than one person will drive, confirm the rules for additional drivers. Do not assume another driver can use the vehicle simply because they are travelling with you.

Additionally, verify age limits and young or senior driver surcharges, as well as licence validity for international drivers. Ensuring all paperwork and eligibility criteria are met upfront avoids unnecessary delays during vehicle pickup.

2. Choose the Right Vehicle

Consider passenger numbers, luggage and the type of roads you expect to travel on.

A smaller car may suit city driving and parking, while a larger vehicle may be more practical for several passengers or substantial luggage.

The vehicle should also feel manageable for the driver. Familiarity with the vehicle’s size and controls can contribute to a more comfortable driving experience.

Evaluate fuel efficiency and engine size, especially if you plan long-distance journeys or hill driving. Choosing an appropriate transmission type, automatic or manual, will also ensure a smoother, stress-free driving experience.

3. Read the Rental Agreement

Review the rental duration, payment terms, deposit, insurance arrangements and return requirements.

Pay attention to restrictions on car rental for self drive use and any conditions relating to additional drivers. Ask for clarification before confirming the booking if a term is unclear.

Check the policy on mileage limits, toll devices, and fuel returns to prevent extra fees. Understanding liability caps and optional excess waiver coverage gives you peace of mind while on the road.

4. Check the Vehicle at Handover

Inspect the vehicle before leaving the collection point. Look at the exterior, wheels, lights, windows and interior.

Check the dashboard for warning indicators and familiarise yourself with basic controls. Confirm that the vehicle condition is recorded.

A careful handover gives you a clear reference for the vehicle’s starting condition.

Take photos or a quick video of existing scratches, dents, and the current fuel level before driving away. Ensure any existing damage is explicitly noted on the rental checklist signed by both parties.

5. Understand What Happens During a Breakdown

Ask what procedure to follow if the vehicle develops a problem during the rental. Find out who to contact and what assistance is available.

Knowing the process before setting off can make an unexpected situation easier to manage. Keep the relevant contact information accessible during the rental.

Verify whether 24/7 roadside assistance is included or available as an add-on, and ask about towing coverage. Knowing whether a replacement vehicle will be provided minimises potential travel disruptions.

6. Confirm the Return Process

Check the return location, date and required time. Understand any instructions regarding fuel, cleanliness or vehicle inspection.

If the return process involves a particular handover procedure, make sure you know it before the rental begins. This helps you plan the final part of the booking.

Clarify drop-off procedures if returning outside standard business hours, including key drop box locations. Obtaining a final inspection report or clearance receipt protects you against post-rental damage claims.

Questions to Ask

Before arranging car rental for self drive, ask:

  • What documents must the driver provide?
  • Can additional drivers be registered?
  • What vehicle model or category will be supplied?
  • What does the rental agreement include?
  • What should I do if the vehicle develops a problem?
  • Where and when should the vehicle be returned?

A clear understanding of the booking can make self-drive travel more manageable. Review the vehicle, terms and practical procedures before committing to the rental.

Contact Ecube Vehicle Rental to discuss car rental for self drive based on your travel plans and vehicle requirements.

Mobile wheel service can remove a transport problem without removing vehicle downtime. In a service that collects the wheels for workshop restoration, the car remains at the agreed location until they return. Before booking, establish how that process works at your property, whether the location is acceptable and how you will manage the period when the vehicle is unavailable.

Mobile can describe transport rather than the workshop

The word mobile sounds straightforward until two people use it differently. An owner may imagine every part of the work happening beside the parked vehicle. A provider may mean that staff remove the wheels, transport them to a workshop and return to reinstall them. Neither interpretation should be left to assumption when you are planning around the car’s availability.

The published process associated with Onyx Rims’ service for Toronto owners describes wheel removal at the customer’s property, transport to the shop, restoration and reinstallation. It is a useful example of why the service location and the restoration location can differ. Confirm the arrangement offered for your address and particular work rather than treating a general description as approval for every property.

Ask what information the provider needs about the site before accepting the booking. A private driveway, shared parking area and managed underground garage present different practical arrangements. The service provider must decide whether it can perform its work at the proposed location. The owner can supply photographs and access information, but should not improvise support arrangements or prepare to remove wheels independently.

Also identify which portions of the project are subject to inspection. A transport arrangement does not mean the final restoration scope is already known. If assessment at the workshop reveals that repair is unsuitable or additional work needs discussion, the provider should know how to reach you. That decision can affect both the technical recommendation and the time the vehicle remains in place.

The parking space becomes part of the arrangement

For a Toronto resident who does not control a private driveway, the parking space may be the most important booking detail. Review the applicable property arrangements and obtain any permission required from the responsible owner or manager. This is not a statement that every building has the same rules. It is a reminder that a service company’s willingness to visit does not grant permission to use a shared space.

Describe access accurately. Gates, height restrictions, assigned spaces and visiting procedures can matter to someone arriving with equipment. Send the useful details through the agreed booking channel instead of assuming the technician can resolve everything on arrival. If access credentials are needed, arrange them securely and for the appropriate visit; do not publish them in a general instruction sheet left in the vehicle.

Think beyond the first appointment. The car may need to occupy the same place through the restoration period, and a second visit must also be possible. A location that is available for one afternoon may not support the complete arrangement. If the building expects vehicles to move for scheduled work, tell the provider before the wheels leave so the conflict can be addressed while alternatives remain available.

The provider should explain the boundaries of its service at the site, including who handles the vehicle and equipment. Keep children, pets and other household activities out of the agreed work area as directed. The owner’s contribution is making access and occupancy workable, not taking over technical tasks. A convenient arrangement depends on both sides understanding their responsibilities.

Build the week around a stationary vehicle

Keeping the car at home can feel as though it remains available, but a vehicle without its wheels is not part of your transport plan. List the journeys you normally make during the expected period and arrange alternatives where needed. The relevant cost may be a few changed routines rather than a rental car, but it should still be considered before selecting the appointment date.

Avoid building a critical journey around an unconfirmed completion time. Ask how the provider estimates turnaround, what could change it and when you should expect an update. No general article can promise that a finish process, inspection or parts decision will fit a particular household deadline. If you have a fixed commitment, explain it early enough for the provider to say whether the proposed plan is realistic.

Remove items you will need from the car before the service begins, following the provider’s instructions about access afterwards. A school bag, work pass or other routine possession can become inconveniently inaccessible when you have agreed not to approach or use the vehicle. This is an ordinary household planning step, but it makes the period of downtime less disruptive.

Nominate one person to receive updates and approve changes. In a busy household, information can otherwise arrive through several people and become inconsistent. The contact should know the authorized scope and be able to discuss a revised recommendation. If that person will be unavailable, arrange an alternative in advance rather than expecting the service team to decide who may authorize work.

Make the return visit as clear as the first

Confirm how you will be notified that the wheels are ready to return and what access is needed for reinstallation. If the property uses scheduled visitor access, reserve the return visit through the appropriate process. A successful workshop stage does not finish the logistical job when the provider still needs permission and physical access to reach the vehicle.

At completion, obtain the work record and any relevant aftercare or follow-up instructions. Ask about anything that remains unresolved before treating the car as available for your normal routine. If the scope changed during assessment, the paperwork should reflect the work actually agreed and performed. Keep that record with your vehicle information rather than relying on the original booking message.

The appeal of a mobile arrangement is practical: fewer trips to organise and a service process that can fit around the place where the car already lives. It works best when parking, access and downtime are planned as carefully as the finish itself. Convenience comes from knowing where the vehicle will stay and how life continues around it, even while the wheels are elsewhere.

Planning a short break often begins with selecting transportation that supports reliability during every mile. Buyers frequently compare available inventory options before making a purchase decision. Features, storage capacity, safety systems, and overall condition remain important during evaluation. Many shoppers review listings where used 4Runners at Toyota of Boerne appear among practical choices for varied driving needs. Careful comparison helps identify suitable options for regular outings throughout the year. A balanced purchase approach often supports better ownership satisfaction over time.

Reliable Vehicle Selection

Choosing suitable inventory requires attention to overall condition first. Buyers often compare service records before narrowing available options. Clear vehicle history supports stronger purchase confidence during evaluation. Consistent upkeep often reflects dependable ownership standards previously maintained.

Everyday Driving Support

Useful vehicle features help simplify regular transportation requirements effectively. Spacious layouts assist in carrying personal belongings during short outings. Well-designed interiors improve usability throughout changing schedules. Dependable operation supports smoother movement across different routes.

Practical Features for Better Mobility

Several vehicle elements contribute to improved daily transportation choices.

  • Spacious cargo sections support organized packing during short outings.
  • Adjustable seating layouts provide flexible arrangements for changing needs.
  • Reliable braking systems assist safer movement across varying routes.
  • Visibility support functions improve awareness during regular driving situations.
  • Cabin storage areas help manage belongings without unnecessary clutter.
  • Durable materials support longer usability across ownership periods.
  • Simple control placement improves accessibility during routine operation.
  • Consistent performance supports dependable transportation throughout weekly schedules.

Balanced Ownership Considerations

Purchase decisions should include both usability and long-term value. Reviewing condition reports helps identify dependable inventory selections. Financial considerations remain important throughout comparison activities. Clear information supports informed choices during the shopping process.

Which Vehicle Details Support Better Purchase Decisions Today?

Buyers often focus on several important factors before choosing inventory. Vehicle condition, maintenance history, available features, and overall practicality influence evaluations significantly. Careful inspection helps identify selections matching transportation requirements appropriately.

Another useful consideration involves ownership expectations over longer periods. Around many inventory reviews, used 4Runners at Toyota of Boerne appear within broader comparisons focused on durability, usability, and consistent operation. Balanced assessments often support better purchasing outcomes across changing needs.

Smart Inventory Review Process

Thorough inspections help reveal differences between available inventory choices. Organized evaluation methods support more confident purchasing decisions. Consistent review practices often improve overall selection accuracy.

Helpful Buyer Questions

  • What matters most during inventory comparison? Service history supports stronger purchasing confidence.
  • Which feature deserves close review first? Safety systems require careful evaluation.
  • Does cargo capacity affect usability? Larger storage areas improve practicality.
  • Are maintenance records important during shopping? Documented care shows responsible ownership.
  • Should interior condition influence selection? Cleaner cabins often indicate better upkeep.
  • Can feature availability impact value? Additional functions support greater usability.

Ownership Value Through Careful Evaluation

Reviewing available inventory carefully helps identify suitable transportation options. Condition, functionality, and maintenance records remain important comparison areas. Organized assessments support practical purchasing decisions across varying requirements. Balanced ownership expectations often contribute toward long-term satisfaction.

Consistent Choices Build Better Results

Thoughtful purchasing begins with careful observation rather than quick decisions. Comparing condition, usability, and ownership history creates a stronger evaluation process. Reliable transportation often results from steady review practices across available inventory. Clear information helps support reasonable expectations throughout ownership periods. Consistency during selection frequently delivers better outcomes than pursuing perfection alone.

A diesel truck that will not start is not moving, and the most common reason a diesel truck fails to start has nothing to do with the engine, the fuel system, or the injection components. It is the charging system – the batteries, alternator, and the connections between them – that is responsible for the majority of no-start events on commercial and heavy-duty diesel vehicles. Understanding how the diesel charging system works, what distinguishes it from a gasoline vehicle’s charging system, and how to maintain each component is practical knowledge that prevents roadside failures and costly tow bills.

Modern diesel trucks are more electrically demanding than any previous generation. The engine control module, aftertreatment systems, telematics, cab electronics, and auxiliary equipment all draw from the same charging system that must also crank an engine with compression ratios that dwarf anything in a gasoline vehicle. When that system is operating at the margins of its capacity – aging batteries holding less charge than their labels suggest, an alternator producing at the low end of its output range, corroded connections adding resistance throughout the circuit – the next cold morning or long idle period is often what tips a marginal system into failure.

Why Diesel Trucks Use Dual-Battery Systems

Virtually every heavy-duty and most medium-duty diesel truck runs a dual-battery configuration, and the reason is purely the physics of compression ignition. A diesel engine starts by compressing air until it is hot enough to ignite injected fuel – no spark plugs, no ignition coil, just compression heat. Achieving that compression requires cranking the engine at sufficient RPM against compression ratios typically ranging from 16:1 to 23:1. The electrical current required to spin a starter motor against that resistance is substantial: diesel starters routinely draw 800 to 1,500 amperes during cranking, compared to 150 to 400 amperes for a typical gasoline engine starter.

A single battery capable of delivering that cranking current reliably across temperature ranges and the full span of its service life would need to be physically enormous. Two batteries wired in parallel – the standard diesel configuration – doubles the available cranking amperage and total reserve capacity while using batteries of manageable size and weight. The practical consequence is that a diesel truck’s charging system is managing twice the battery capacity of a comparable gasoline vehicle and must keep both batteries charged and balanced simultaneously.

The dual-battery setup introduces a maintenance complexity that single-battery vehicles do not face: battery imbalance. When one battery in a parallel pair begins declining in capacity – which happens gradually and invisibly as batteries age – the stronger battery carries more of the load during cranking and more of the charging current during operation. The weaker battery free-rides on the stronger one, continuing to measure acceptable voltage while delivering far less cranking current than its label implies. The result is that a dual-battery system can test within acceptable voltage parameters and still fail to crank a cold engine in winter conditions, because the aggregate cranking capacity of the mismatched pair is insufficient even though neither battery individually reads as failed.

Battery Selection and Specifications – What the Numbers Mean for Diesels

Diesel truck batteries are specified by two primary ratings: Cold Cranking Amperes (CCA) and Reserve Capacity (RC). CCA measures the amperage a battery can deliver for 30 seconds at 0°F while maintaining at least 7.2 volts – it is the number most directly relevant to cold-weather starting performance. Reserve Capacity measures how many minutes a fully charged battery can sustain a 25-ampere draw while remaining above 10.5 volts – it determines how long the truck can operate on battery power alone if the alternator fails.

For heavy-duty diesel applications, batteries are typically specified at 800 CCA minimum per battery, with many Class 8 applications using 950 to 1,050 CCA units. Matching both batteries in the pair to identical CCA ratings from the same manufacturer and ideally from the same production batch is the best practice for minimizing the imbalance problem described above. Mixing batteries of different ages, brands, or CCA ratings in a parallel pair accelerates deterioration of both units and reduces the effective cranking capacity of the combined system below what either battery’s individual rating would suggest.

Battery chemistry matters for severe-duty applications. Absorbed Glass Mat (AGM) batteries offer substantial advantages over conventional flooded lead-acid batteries in diesel truck service: superior vibration resistance, higher cycle durability, faster recharge acceptance, and better performance at temperature extremes. AGM batteries tolerate the deep discharge cycles that occur when trucks are parked for extended periods running cab electronics and climate systems, then recovered by alternator charging – a cycle that degrades flooded batteries rapidly. The higher purchase cost of AGM batteries is typically recovered in extended service life and reduced replacement frequency.

The Alternator – Output Requirements and Failure Modes

The alternator converts engine mechanical power into electrical current to charge the batteries and supply all on-board electrical loads while the engine runs. Diesel truck alternators are typically rated at 130 to 200 amperes output for pickup-class trucks, and 160 to 270 amperes for commercial Class 6-8 applications. That output must cover the combined electrical demand of all on-board systems – charging the battery bank, powering the ECM, running the aftertreatment systems, supplying cab heating and air conditioning, operating exterior lighting, and powering any auxiliary equipment – simultaneously, with enough margin remaining to actually charge the batteries when they have been partially discharged.

Alternator output is not constant across engine speeds. Most heavy-duty alternators reach their rated output at engine speeds of 1,800 to 2,500 RPM. At low idle – 600 to 800 RPM on most diesel engines – output may fall to 50 to 70 percent of rated capacity. A truck idling for extended periods running a full electrical load – climate control, lighting, telematics, cab electronics – may actually consume battery reserve faster than the alternator can replenish it at idle speed. This is why extended idling gradually depletes battery charge even with a functioning alternator, and why batteries that appear healthy during normal operation can struggle to crank a cold engine after an overnight idle.

Alternator failure is typically gradual rather than sudden. The most common failure sequence begins with diode degradation inside the rectifier assembly, which reduces total output amperage without fully eliminating it. The alternator continues producing voltage within the normal range but at reduced current capacity. Battery charge gradually declines between operating sessions. Voltage at the battery terminals while the engine runs at normal RPM falls slightly below the 13.5 to 14.5 volt range that indicates proper charging. Without a calibrated voltmeter or battery monitoring system, this decline is invisible until the batteries can no longer crank the engine.

Bearing wear and rotor or stator winding degradation are the other common alternator failure paths, and both typically produce audible warning before complete failure: a growling or whining noise from the alternator that increases with engine speed, or intermittent electrical flickers as the rotor’s contact with brushes becomes inconsistent. Catching these symptoms during routine service inspections allows alternator replacement on a scheduled basis rather than as an emergency roadside repair.

Connection Integrity – The Overlooked Charging System Variable

The batteries and alternator receive most of the attention in charging system maintenance, but the connections between them are responsible for a disproportionate share of charging system problems. Every resistance point in the charging circuit – corroded battery terminals, loose cable connections at the alternator output post, degraded ground straps between the engine block and chassis, oxidized junction blocks in the cable routing – reduces the current that reaches where it is needed and generates heat that accelerates further corrosion and connection degradation.

The ground circuit deserves particular attention. The charging system relies on complete circuit continuity: current flows from the alternator positive terminal, through the battery, and returns to the alternator and engine via the ground path. The primary ground connection – from the negative battery terminal to the engine block and chassis – carries every ampere that the starter draws during cranking and every ampere the alternator produces during charging. A corroded or loose ground connection that adds resistance to this path reduces cranking power and charging efficiency simultaneously, producing symptoms that mimic both a weak battery and a failing alternator.

Battery terminal inspection and cleaning should be part of every preventive maintenance interval. White or bluish-grey corrosion at the terminals is lead sulfate and copper oxide byproduct of normal battery chemistry – its presence is not a sign of battery failure, but its accumulation is a sign that cleaning is overdue. Clean terminals with a wire brush and appropriate terminal cleaner, dry thoroughly, reconnect securely, and apply a corrosion-inhibiting coating to slow future accumulation. Inspect all cable ends at both ends of every cable in the charging circuit, not just at the battery terminals.

Diagnostic Approach – Testing the Charging System Systematically

A systematic approach to charging system diagnosis prevents the common mistake of replacing a battery that is failing due to an alternator problem, or replacing an alternator that is underperforming due to connection resistance. The diagnostic sequence begins with the simplest measurements and progresses to more specific testing only when the simpler tests do not identify the problem. This same structured, sequential approach applies across all diesel systems: diesel engine diagnostics and fault code troubleshooting consistently outperforms reactive parts replacement in both diagnostic accuracy and total repair cost.

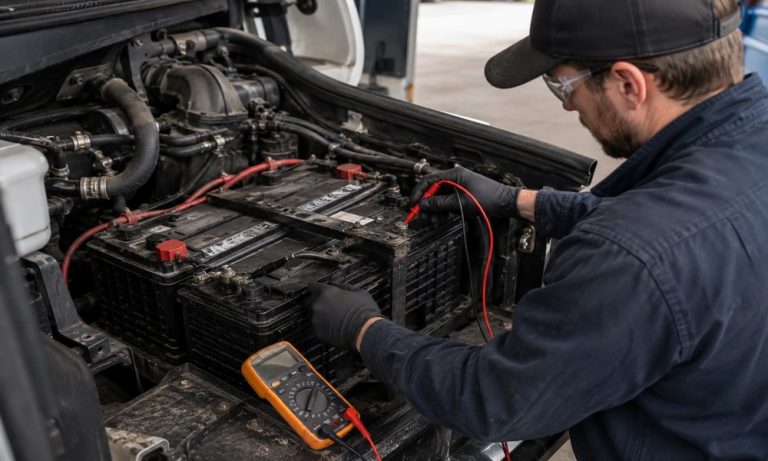
Static battery voltage – measured with the engine off and no loads connected, after the truck has sat for at least two hours – establishes a baseline battery state of charge. A fully charged 12-volt battery reads 12.6 to 12.8 volts. Below 12.4 volts indicates partial discharge; below 12.0 volts indicates significant discharge or capacity loss. In a dual-battery system, measure each battery individually: a significant voltage difference between the two batteries (more than 0.2 volts at rest) indicates imbalance that warrants load testing both batteries separately.

Charging voltage – measured at the battery terminals with the engine running at 1,500 to 2,000 RPM and no major electrical loads active – should read 13.5 to 14.5 volts. Below 13.5 volts indicates insufficient alternator output or excessive resistance in the charging circuit. Above 14.8 volts indicates a voltage regulator problem that is overcharging the batteries. Measure at the alternator output terminal as well as at the battery: if alternator output voltage is within range but battery terminal voltage is lower, the difference represents resistance loss in the charging cable between them.

Load testing both batteries individually under controlled current draw – using a dedicated battery load tester – is the definitive test of remaining battery capacity. A battery that reads 12.7 volts at rest but drops below 9.6 volts under load has insufficient cranking capacity even though its resting voltage appeared normal. This is the test that identifies the battery imbalance problem in dual-battery systems that static voltage measurement misses.

Maintenance Intervals and Integration with Scheduled Service

Charging system maintenance is most effective when integrated into the scheduled service intervals that govern all other diesel truck maintenance rather than performed reactively when problems appear. Heavy-duty truck preventive maintenance schedules structured around mileage and time intervals provide natural inspection points for charging system condition checks that catch developing problems before they produce failures.

At every oil change interval, inspect all battery terminal connections and cable ends for corrosion, check battery case condition for cracks or swelling, and verify battery hold-down security. A loose battery that vibrates in service fails faster and can cause cable damage from chafing. Check alternator belt condition and tension – a slipping belt reduces alternator output and produces belt wear that can lead to sudden belt failure.

Annually or at 50,000-mile intervals for high-mileage commercial trucks, load-test both batteries individually and record the results. Trending battery capacity over successive annual tests identifies declining batteries before they reach the threshold of unreliability. Replace batteries in pairs when either one in a parallel set falls below acceptable capacity – installing one new battery alongside a partially degraded battery recreates the imbalance problem within months.

The specific replacement intervals:

  • Conventional flooded batteries in diesel truck service: 3 to 4 years average service life under normal conditions, shorter with frequent deep cycling or extreme temperature exposure
  • AGM batteries: 4 to 6 years average service life, with better retention of capacity through more of their service life
  • Alternators: 150,000 to 200,000 miles in normal commercial service, with bearing inspection recommended at 100,000-mile intervals
  • Charging cables and grounds: inspect annually, replace any cable showing cracking insulation, green corrosion at connection points, or evidence of heat damage

The Bottom Line

The diesel truck charging system is the enabler of everything else. No matter how well-maintained the engine, fuel system, and drivetrain are, a failed charging system stops the truck as effectively as any mechanical failure – and does so at the least convenient moments, because cold temperatures and extended idling are exactly the conditions that reveal the margins that adequate maintenance would have preserved.

Dual-battery management, alternator output monitoring, connection integrity inspection, and systematic load testing are not complex procedures, but they require deliberate attention at regular intervals rather than reactive response to symptoms. Building charging system checks into the scheduled maintenance cadence for a diesel truck converts what is often an emergency repair into a routine parts replacement on a timeline that works for the operator rather than against them.

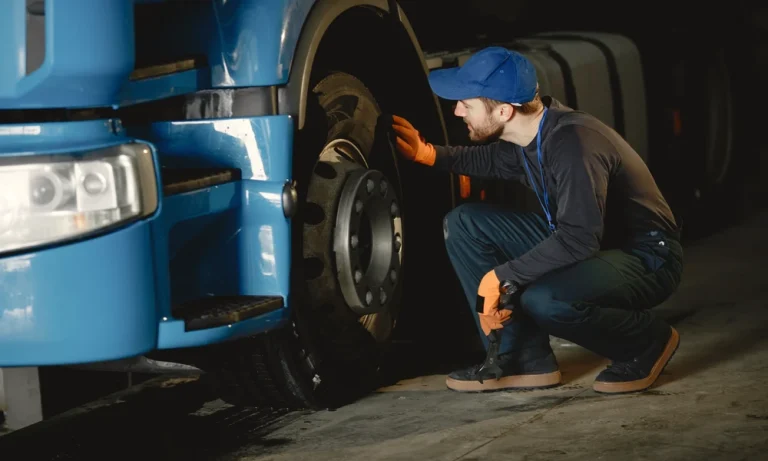
Engine oil acts like the lifeblood of your vehicle. It keeps the heavy metal parts moving smoothly. This fluid reduces friction between the fast-spinning components. High quality oil prevents heat buildup during long drives. You need clean oil for a healthy engine. Modern engines require specific chemicals for peak performance. These additives protect the delicate surfaces from early wear. Poor oil choices lead to very expensive repairs. Choosing the right grade ensures your car stays strong. Charlie & Ray’s engineers their products for maximum fuel economy gains. Your car feels faster with fresh and clean oil.

Protecting Internal Components from Excessive Wear

Friction is the greatest enemy of any combustion engine. Moving parts rub together at extremely high speeds. The oil creates a thin protective film on metal. This barrier stops metal from touching other metal surfaces. Sometimes, low quality oils break down under high heat. Then the protective film disappears and parts grind together. Now the engine suffers from permanent scratches and damage. Charlie & Ray’s provides lubricants that handle extreme pressure very well. You will notice a quieter engine with better oil. High quality fluids extend the life of the pistons.

Boosting Fuel Efficiency and Power Output

Thick and dirty oil makes the engine work harder. This resistance consumes much more fuel during your commute. The engine loses power when fighting against heavy sludge. High quality synthetic oils flow very easily through pipes. Now the engine breathes better and produces more power. This efficiency saves you money at the local gas station. Smooth operation leads to a much better driving experience. You should invest in premium oil for better results.

Ensuring Reliability for Many Years of Use

Long term reliability depends on consistent maintenance and care. Metal parts stay young with the right chemical protection. Oxidation can cause oil to turn into thick jelly. This sludge blocks the flow of essential life fluids. But quality synthetic oils resist this chemical breakdown process. The engine remains dependable even during the coldest winters. Now you can trust the car for long trips. Reliability starts with the fluid inside the metal heart. You will avoid breakdowns with a regular Auto Repair in Essex, MD schedule. Good oil keeps the vehicle on the road longer.

Conclusion

Engine oil quality defines the future of your vehicle. It manages heat and reduces wear every single day. High performance depends on the purity of the lubricant. But neglecting the oil leads to total engine failure. Now you understand the importance of choosing great products. The small cost of oil saves thousands in repairs. You must prioritize the health of the moving parts. Reliable cars always start with excellent engine oil quality. Your vehicle deserves the best care for every mile. Keep the engine clean for a very long life.

Corporate car hire provides businesses in Singapore with reliable, professional transport for executives, clients, and event logistics without the overhead of maintaining a company fleet. In a city where business meetings, conferences, and corporate functions run on tight schedules, having dependable vehicles available on demand removes a significant source of stress. The right rental partner becomes an extension of your operations, keeping people moving where they need to be, on time and in comfort.

Why Businesses Choose Rental Over Fleet Ownership

Maintaining a company-owned fleet in Singapore is an expensive proposition. Between Certificate of Entitlement costs, insurance premiums, road tax, servicing, and dedicated parking, the numbers add up quickly. For most businesses, especially small and medium enterprises, these costs are difficult to justify when vehicles may sit idle for days between uses.

A business vehicle rental arrangement converts that fixed cost into a variable one. Companies pay only for the vehicles they need, when they need them. During a busy conference week, a firm might hire five sedans and a van. During quieter periods, the commitment drops to zero. This flexibility is particularly valuable for companies whose transport needs fluctuate with project cycles and client schedules.

Common Corporate Transport Scenarios

Businesses in Singapore hire vehicles for a wide range of purposes. A company car leasing arrangement can cover:

  • Airport transfers for visiting executives and international clients
  • Daily transport for senior management during multi-day business events
  • Shuttle services between office locations, hotels, and convention centres
  • Client entertainment, including dinner pickups and city tours
  • Product launches and roadshows requiring branded or unmarked vehicles
  • Employee relocation support during the first weeks of a posting

Each scenario has different requirements. A client airport pickup calls for a premium sedan with a professional appearance. An employee shuttle between offices may be best served by a minivan. A good corporate car hire provider offers the fleet variety to match.

What to Look for in a Corporate Rental Partner

Choosing the right provider affects how smoothly your business transport runs. Companies should evaluate potential partners on several criteria:

  • Fleet range and vehicle condition, ensuring cars are well-maintained and presentable
  • Flexibility to scale up or down based on changing requirements
  • Clear and competitive pricing without hidden surcharges
  • Responsive customer service for last-minute changes or emergencies
  • Billing and invoicing systems that suit corporate accounts

Reliability matters above all else. A car that arrives late for a client pickup reflects badly on the entire organisation. The best corporate rental providers understand that they represent your company every time they deliver a vehicle or a driver.

As Singapore’s founding Prime Minister Lee Kuan Yew once said, “Efficiency is doing things right; effectiveness is doing the right things.” For corporate transport, that means choosing a partner who consistently delivers on both.

Managing Costs Without Compromising Quality

Budget control is a practical concern for any business. The good news is that corporate vehicle rental need not be extravagant. Negotiating a standing agreement with a preferred provider often secures better rates than booking ad hoc. Volume commitments, even modest ones, give the rental company predictable revenue in exchange for preferential pricing.

Cost management strategies include:

  • Matching vehicle class to the occasion, using premium cars for client-facing duties and standard models for internal transport
  • Booking in advance to secure availability and avoid peak-period surcharges
  • Consolidating trips where possible to reduce the number of vehicles required
  • Reviewing invoices regularly to ensure charges align with agreed terms

A transparent provider will make this process straightforward. Detailed invoicing broken down by vehicle, duration, and any extras allows finance teams to track spending accurately and identify opportunities for savings.

Event Transport That Runs on Schedule

Corporate events add a layer of complexity to transport planning. Conferences, seminars, product launches, and gala dinners all involve moving groups of people between multiple locations within tight time windows. Late arrivals and missed connections create a poor impression and disrupt carefully planned programmes.

Working with a business car rental company experienced in event logistics takes this pressure off your team. These providers know how to plan routes, stage vehicles at the right locations, and communicate with drivers in real time to handle last-minute changes.

For larger events, a dedicated account manager from the rental company coordinates all vehicle assignments and adjustments. This single point of contact simplifies communication and ensures nothing falls through the cracks.

Building a Long-Term Transport Partnership

Businesses that hire vehicles regularly benefit from establishing an ongoing relationship with a single trusted provider. Over time, the rental company learns your preferences, anticipates your needs, and assigns their best vehicles and drivers to your account.

This partnership model delivers consistently high service and simplifies administration. For businesses operating in Singapore’s fast-paced commercial environment, having corporate car hire arrangements they can count on frees up time and attention for the work that actually generates revenue.

The sky turns dark and heavy. Rain begins to fall against the glass. You turn the wiper switch quickly. Your wipers move back and forth smoothly. This simple action depends on one part. That part is the wiper relay. It acts like a small brain. The relay sends power to the motor. Weather conditions change how this part works. You might notice small delays during storms. Extreme heat or cold affects the electrical flow. Auto Repair in Augusta, GA experts see these issues often. Understanding these impacts helps maintain your vehicle. C&C Automotive provides excellent guidance for modern drivers. Proper care keeps your vision clear always.

Extreme Cold and Electrical Resistance

Winter brings freezing air to the roads. Low temperatures change how electricity moves now. Metal components inside the relay contract tightly. This physical change increases internal electrical resistance. Sometimes the relay struggles to click shut. The wipers might move very slowly then. You could hear a strange clicking sound. Thick frost adds weight to the blades. This extra load stresses the tiny relay. The circuit gets hot despite the cold. C&C Automotive offers reliable testing for winter driving. Cold weather testing prevents sudden relay failure. Now you can drive safely through snow.

High Heat and Component Longevity

Summer sun beats down on the hood. Intense heat builds up inside the engine. The wiper relay sits near this heat. High temperatures can melt thin plastic casings. Metal parts expand under the baking sun. This expansion causes the relay to stick. Sometimes the wipers will not turn off. The internal coil loses its magnetic strength. Heat damage happens slowly over many months. You may not see the damage immediately. The relay eventually burns out during use.

Humidity and the Risk of Corrosion

Moisture hangs heavy in the humid air. Damp conditions lead to invisible metal rust. Water vapor enters the relay housing easily. This moisture creates a thin layer of oxidation. Corrosion blocks the flow of vital electricity. The wipers may stutter across the glass. Now the electrical connection becomes very weak. Poor connections create dangerous heat during storms. You might smell burning plastic inside then. Sometimes the wipers stop in the middle. Clean terminals prevent this common moisture problem. Proper sealing keeps the internal parts dry. Reliable repairs ensure the relay stays functional.

Conclusion

The weather dictates how your car performs. Your wiper relay feels every temperature change. Heat and cold test the electrical limits. Moisture creates hidden rust on metal surfaces. You must monitor your wipers during storms. Reliable parts ensure a very safe journey. C&C Automotive helps drivers maintain clear visibility always. Modern cars need functional relays for safety. Now you understand the impact of weather. Take action before the next big storm. Clear glass starts with a healthy relay. Keep your vehicle ready for any season. Proper maintenance keeps the road ahead visible.

For many RV enthusiasts, staying connected on the road is no longer a luxury-it’s a necessity. Whether for remote work, streaming, or simply keeping in touch with loved ones, reliable internet is crucial. Starlink has emerged as one of the most popular solutions for travelers seeking high-speed satellite internet, but installing it in an RV comes with its unique set of challenges. Understanding these obstacles and learning how to overcome them can save time, frustration, and even money, ensuring a seamless online experience no matter where your travels take you.

RV Starlink installation differs from a standard home setup because of the mobility factor. The constant movement, varying landscapes, and limited space require a thoughtful approach to equipment placement, connectivity, and power management. While the system itself is designed to be user-friendly, real-world conditions on the road often present unexpected hurdles. By exploring common installation challenges and practical solutions, RV owners can maximize the benefits of Starlink while minimizing interruptions to their digital lifestyle.

Mounting and Equipment Placement

One of the first challenges RV owners face is finding the right place to mount the Starlink antenna. Unlike a fixed home installation, RVs require consideration for movement, wind, and vibration while traveling. Placing the dish in a location that provides a clear view of the sky is critical for maintaining a stable connection. Trees, overhangs, or rooftop equipment can obstruct the signal, leading to intermittent connectivity or reduced speeds.

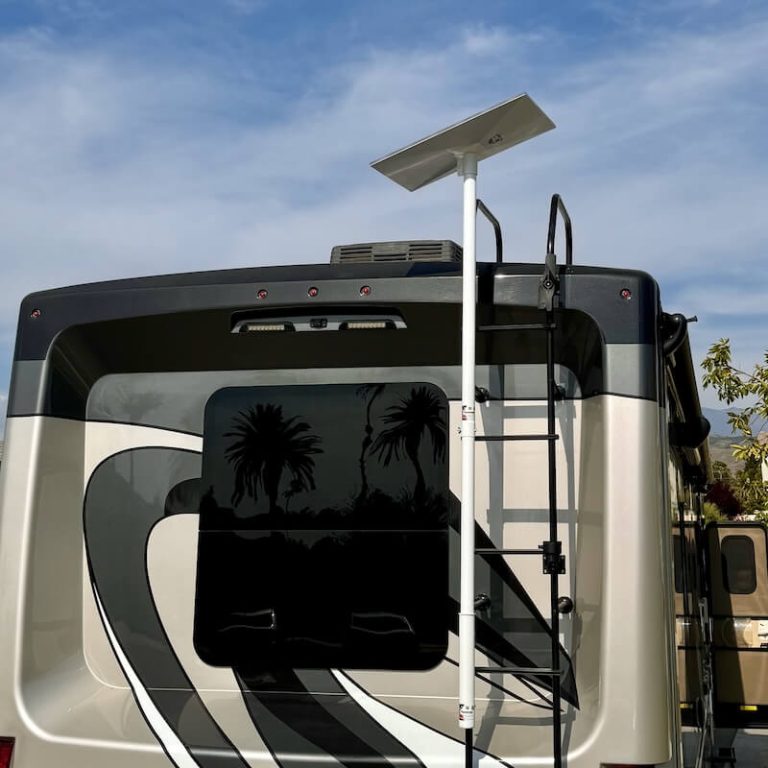
Many RV owners struggle with balancing accessibility and stability. A roof-mounted dish may provide the best line of sight but requires secure mounting hardware and consideration for overhead clearance when driving under bridges or low-hanging branches. On the other hand, portable setups can be moved to an open area, but they may be less convenient and require additional effort to set up each time the RV parks. A practical solution involves testing multiple locations and using brackets or mounts specifically designed for mobile setups. Some owners invest in telescoping poles or swivel mounts that allow quick adjustments, ensuring the dish maintains a clear view of the sky while remaining safe during travel.

Power and Connectivity Considerations

Another significant challenge in RV Starlink installation is ensuring consistent power supply. Unlike traditional home environments, RVs often rely on limited battery capacity, solar panels, or generators. The Starlink dish requires a reliable power source, and fluctuations or interruptions can affect performance. Some users experience connectivity drops when the RV switches between power sources or when battery levels are low.

Addressing this issue often involves integrating the Starlink system with the RV’s electrical setup. Using dedicated inverters, surge protectors, or uninterruptible power supplies can stabilize voltage and prevent interruptions. Additionally, planning for energy-efficient usage, such as operating the Starlink system during periods of sufficient battery charge or while plugged into shore power, helps maintain a reliable connection. Understanding your RV’s power limitations and how the Starlink system consumes energy is essential for ensuring smooth operation, especially for long-term travel or remote work scenarios.

Connectivity challenges also extend to network configuration within the RV. Some users encounter difficulties with Wi-Fi signal distribution, especially in larger RVs or multi-level models. Ensuring the Starlink router is positioned centrally, free from obstructions, and paired with Wi-Fi extenders or mesh systems can help maintain strong internet coverage throughout the vehicle. Planning the layout and network configuration in advance simplifies the installation process and reduces frustration when using multiple devices on the road.

Environmental and Mobility Challenges

The environment presents another set of challenges for RV Starlink installation. Weather conditions, terrain, and mobility can all impact signal quality. Heavy rain, snow, or dense cloud cover may temporarily reduce speeds or disrupt connectivity. While Starlink is designed to function in various climates, RV owners must remain aware of potential interruptions and plan accordingly.

Mobility adds a layer of complexity. Constantly moving from one campsite to another can result in obstacles that would not affect stationary installations. Trees, hills, and other natural features may temporarily block the satellite view, and parking in uneven areas can affect the stability of the dish. In some cases, manual repositioning or minor adjustments may be necessary to maintain optimal performance. Travelers who embrace flexibility, take time to observe the signal strength, and experiment with different parking spots often find ways to mitigate these challenges.

Additionally, some users report interference from other rooftop equipment, such as air conditioning units or satellite TV dishes. Careful planning to separate equipment and minimize obstructions can improve signal strength and reduce connectivity issues. Protective covers or stabilizing mounts can also safeguard the Starlink system against wind, vibration, and minor impacts, extending its lifespan and reliability.

Tips for a Smooth RV Starlink Installation

Successfully navigating the challenges of RV Starlink installation requires preparation, patience, and creativity. First, carefully evaluate the RV layout to identify optimal mounting locations with clear sightlines. Experiment with portable setups if a fixed roof mount is not feasible. Second, integrate the system with a stable power source, considering inverters, surge protection, and battery management to ensure uninterrupted operation. Third, account for environmental factors by testing the system in various weather conditions and adjusting positioning as needed.

Additional tips include familiarizing yourself with Starlink’s software tools and troubleshooting guides. The app provides guidance on placement, signal quality, and firmware updates, which can prevent common installation frustrations. Regular maintenance, such as cleaning the dish and checking mounts, helps avoid performance issues over time. Finally, connecting with online RV communities or forums can provide valuable insights and practical solutions based on real-world experiences, offering shortcuts and advice that save time and effort.

RV Starlink installation may present challenges, but each obstacle has practical solutions that allow travelers to enjoy reliable internet anywhere. By addressing mounting, power, environmental, and mobility considerations, RV owners can transform the way they connect on the road. With thoughtful planning and proactive problem-solving, Starlink provides an unprecedented level of connectivity that enhances the RV lifestyle, whether for work, entertainment, or staying connected with friends and family.

In addition to personal taste and design, how a motorcycle owner plans to use their motorcycle greatly impacts which one they decide to buy. Picking out a motorcycle, without knowledgeable consideration of the intended use, can lead to severe discomfort, extra costs, and safety issues. Discerning the intended use, whether it’s for commuting, leisure, touring, or off-road, is vital to making the right decisions.  

Urban Riding and Everyday Use

For riders that intend to use the motorcycle for everyday commuting, efficiency and practicality are the most vital. Small motorcycles are more fuel efficient, and are easier to handle, and steer in traffic. They are also easier to park, and are more reliable in stop-and-go traffic. A motorcycle designed for use in the city will usually also have great responsive brakes making it more ideal for use in congested areas.

For Weekends and Recreational Riding

When your motorcycle will be used for riding on the weekends or for recreational purposes, riding, other considerations come into play. Cruisers and sport bikes are great options for recreational riding, as they provide great performance, and are also stylish and fun to ride. Although these bikes can be more costlier when it comes to maintenance and fuel than a daily commuter motorcycle, they provide a great balance of speed, handling, and looks to make the weekend rides more enjoyable. 

Distance Riding

When it comes to long distance riding, a motorcycle is needed that is great in comfort, stability and storage. Touring and Adventure bikes are built for long rides with adjustable seating, more fuel storage and extra storage compartments for luggage. Long rides can become tiring, but features like adjustable suspensions, more storage, and comfortable seating can make the ride more enjoyable. When planning to buy used motorcycle (รับ ซื้อ มอเตอร์ไซค์, term in Thai) for touring, one of the most important considerations is to buy one that is built for endurance and reliability.

Off Road and Adventure Riding

Motorcyclists focused on adventure or off road riding have their own unique requirements their motorcycle must possess. No problems with these sorts of bikes. These sorts of off-road bikes have robust suspension and lightweight frames with tough tires for the tough terrain of off-road riding. Additionally, off-road motorcycles are built to handle the jagged and uneven trails, mud, and other obstacles that city or on-road touring motorcycles can’t. Choosing off road bikes that have the right features for off road use, improves safety in the more challenging rides, and avoids mechanical strain.

A portion of riders are on motorcycles that have the highest accelerations and speeds. These sorts of bikes tend to be sport bikes, and big displacement motorcycles. These bikes are built for adventure. These sorts of machines are of costly nature. Less long distance travel, more side roads and commuting, fuel costs are high, and cruising is of a bad nature as the ergonomics are stiff. Choosing a bike that fulfills the required specs of the ride, is best as to not waste financial resources.